





You are about to start a construction project. The materials are ordered, the schedule is set. Then day one arrives and someone is missing a drill bit, a cable detector, or a spare battery. Work stops. Everyone waits.
Getting your tool setup right before the job starts is not a detail. It is the difference between a site that runs and one that stalls.
This guide covers every tool category you need on a construction site — cutting and demolition, drilling and fastening, measuring, lifting, and safety. By the end, you will have a clear checklist to work from before the first day on site.
The Essential Categories
Construction tools fall into four working groups. Every tool on a site belongs to one of them: cutting and demolition, drilling and fastening, measuring and marking, and lifting and holding. Get each category covered before work begins. A gap in any one of them will slow the whole job down.
Cutting and Demolition
These are the tools that shape and break materials. On a construction site, you will use them constantly.
Angle grinder — the most versatile cutting tool on site. Use a cutting disc for steel, pipe, and concrete. Switch to a grinding disc for cleaning welds and removing material. Keep both disc types on hand.
Reciprocating saw — essential for demolition work. Cuts through timber, plasterboard, nails, and pipe in tight spaces where a circular saw cannot reach. Blade choice matters: use a wood blade for framing, a bi-metal blade for mixed materials.
Circular saw — the standard tool for cutting timber framing, boarding, and sheet material. Fast, accurate, and easy to guide with a straight edge. A corded model is preferable on a busy site where battery drain is a concern.
Demolition hammer — for breaking concrete, removing screed, and chasing walls for pipes and cables. Do not use a rotary hammer for heavy demolition work. A dedicated demolition hammer handles the load without the wear.
Tile cutter — needed for any finishing phase involving ceramic or porcelain. An electric wet cutter gives clean, accurate cuts. A manual score-and-snap cutter works for straight cuts on ceramic but will not handle porcelain reliably.
Drilling and Fastening
These tools go into almost every task on site — fixing frames, anchoring to masonry, driving fixings, and securing boarding. This is the category where battery management matters most.
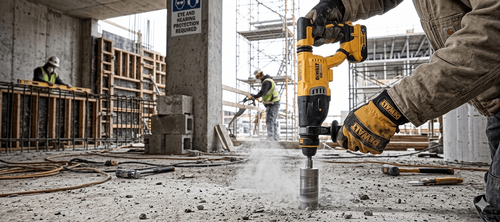
Rotary hammer drill (SDS) — the primary drill for any work involving concrete, block, or masonry. The SDS chuck absorbs the hammer action without transferring it to the user. Use SDS-Plus for holes up to 30mm. Step up to SDS-Max for larger diameter work or heavy chasing.
Cordless drill and impact driver — work as a pair. Use the drill for boring holes in timber and sheet material. Use the impact driver for driving screws and fixings at speed. Carrying both saves constant bit-swapping and speeds up framing and boarding significantly.
Magnetic drill — needed when working with structural steel. It clamps directly to the steel surface and drills clean, precise holes that a handheld drill cannot achieve. Not an everyday tool, but essential when the job calls for it.
Drywall screwdriver — if the job involves plasterboard, a dedicated drywall screwdriver sets screws at the correct depth consistently without breaking the board face. Doing this with a standard drill is slower and less reliable.
Air compressor and nail gun — the fastest fastening setup for timber framing and first-fix boarding. Size the compressor to the nail gun's CFM requirement. A compressor that cannot keep up with demand causes constant pressure drops and slows the work down. A 24-litre tank handles most single-gun setups comfortably.
One practical rule for cordless tools: standardise on a single battery platform across your drills, saws, and drivers. Mixing brands means managing multiple chargers and battery types on site. One platform, one charging station, far less downtime.
Measuring and Marking
Every cut, every fixing, every frame starts with a measurement. Errors here compound through the whole job. The right measuring kit costs very little compared to the time lost correcting misaligned work.
Tape measure — the most-used tool on any site. Get a 5m minimum for general work, 8m for larger spans. A wide blade that locks rigidly at extension saves time when measuring alone. Keep a spare. Tape measures get lost and damaged constantly on site.
Spirit level — you need two: a short one (600mm) for checking individual fixings and frames, and a long one (1200mm or more) for walls, door frames, and larger runs. A level that is even slightly out of calibration causes problems that only show up later.
Laser level — essential for anything requiring consistent height across a large area: setting out floor levels, aligning suspended ceilings, positioning fixtures across multiple walls. A rotating laser level covers an entire room in one setup. It replaces hours of manual measurement.
Chalk line — for snapping long straight reference lines across floors, walls, and sheet material. Faster and more accurate than a pencil and straightedge for any line over a metre.
Speed square and combination square — the speed square gives quick 90 and 45 degree checks on timber cuts. The combination square handles depth measurements and precise 90 degree marking for joinery and boarding work.
Pencils and markers — stock more than you think you need. Pencils for timber and board. Permanent markers for steel, pipe, and masonry. A bright marker or lumber crayon for high-visibility lines on rough surfaces.
Measuring tools should stay clean and protected. A spirit level that gets dropped or a tape measure with a bent blade will quietly introduce errors into every measurement it takes.
Lifting, Clamping, and Holding
Materials need to be held in place before they can be fixed. Trying to cut, drill, or fasten unsupported work is slower, less accurate, and more dangerous. This category does not get enough attention in tool planning.
Clamps — the most underestimated tool on site. You will always need more than you brought. F-clamps handle general timber and panel work. Bar clamps span wider material and glue-ups. Spring clamps are fast for light holding tasks. A minimum of six clamps of mixed sizes covers most situations. Double that for a busy site.
Sawhorses — a stable pair of sawhorses is the foundation of clean cutting work. They support sheet material, long timbers, and doors during cutting and fitting. Folding steel sawhorses are robust enough for site use and pack flat for transport.
Workbench — a folding site workbench with a built-in vice handles smaller cutting, marking, and assembly tasks. It keeps work at the right height and reduces fatigue during detailed work. On a large site, position one in the main working area and one near the material store.
Hydraulic sack truck and pallet truck — moving heavy material by hand on a construction site leads to injuries and broken materials. A sack truck handles bagged materials, equipment cases, and stacked boarding. A pallet truck is needed when moving materials delivered on pallets across flat ground.
Pipe and material stands — adjustable roller stands support long lengths of pipe, timber, and conduit during cutting and threading. One person can handle long material safely without a second pair of hands.
The rule on clamping is simple: if it is not secure, do not cut it. Every shortcut in this category costs time or causes damage.