





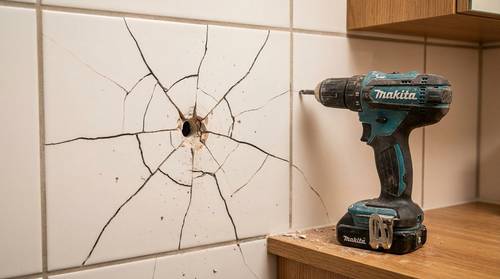
You’ve got the perfect towel rail or mirror ready to install. Then the doubt hits: how do you drill into tile without cracking it? One wrong move and that expensive bathroom tile could split.
Here’s the good news: drilling into tile is not complicated. Tiles usually crack because of the wrong drill bit, too much speed, or too much pressure. With the right tools and a simple step-by-step approach, you can drill clean, precise holes in ceramic or porcelain. By the end of this guide, you’ll feel confident picking up the drill and getting it done right.
Essential Tools and Materials You'll Need
Before you drill anything, get your tools ready. When it comes to tile, the right equipment makes the difference between a clean hole and a cracked surface.
The Drill
You do not need a massive, heavy-duty machine. But you do need the right type of drill.
Use a standard corded or cordless drill. Do not use hammer mode while drilling through the tile surface. The hammer action creates vibration that can instantly crack ceramic or porcelain.
Look for these features:
- Variable speed control for slow, controlled drilling
- Forward and reverse function
- Comfortable grip for stability
- Keyless chuck for quick bit changes
For power, a 12V to 18V cordless drill is more than enough for bathroom or kitchen projects. If you prefer corded, 500W to 800W works great.
Only switch to hammer mode after you fully penetrate the tile and start drilling into masonry behind it.
If you need a reliable model, browse our full drill range. You will find corded and cordless options from trusted brands designed for precision control.
Drill Bits for Tiles
This is the most important part of drilling into tile. The wrong bit is the fastest way to crack a tile.
For ceramic tiles:
- Carbide-tipped masonry bits work well for standard ceramic.
- Glass and tile bits with a spear-point tip are ideal for glazed surfaces.
For porcelain tiles:
- Diamond-tipped drill bits are essential.
- Diamond core bits are best for larger holes above 20mm.
Porcelain is much harder than ceramic. Carbide bits often struggle and wear out quickly. Diamond bits cost more, but they last longer and drill cleaner holes.
Common sizes for fixtures include 5mm, 6mm, 8mm, and 10mm. A smart move is to start with a 3mm or 4mm pilot hole and then enlarge it to the final size.
Cheap bits overheat fast and dull quickly. Quality diamond bits can drill dozens of holes before wearing out. If possible, choose bits with hex shanks for better grip and less slipping.
Supporting Materials and Safety Equipment
Small accessories make a big difference when drilling into tile.
Marking tools:
- Pencil or marker for initial marking
- Masking tape or painter’s tape to prevent slipping
- Spirit level for straight alignment
Cooling supplies:
- Water spray bottle
- Damp sponge or small water container
Cooling matters because friction creates heat. Heat can dull your bit and increase the risk of cracks.
Safety equipment:
- Safety glasses or goggles
- Dust mask for silica-based tile dust
- Work gloves if they do not reduce your grip
Before drilling, always scan the wall with a pipe and cable detector. Bathrooms and kitchens often hide water pipes and electrical wiring behind tiles. Drilling blindly is risky.
Workspace Preparation
A few minutes of preparation can save you hours of repair work.
Lay down towels or a drop cloth to catch dust and water. Remove nearby items that could be damaged. Make sure you have strong lighting so you can see exactly where you are drilling.
If you are mounting something high, use a stable step ladder. Clear enough space around you to hold the drill steady and maintain control.
Once your drill, bits, tape, water, and safety gear are ready, you are set up for success. Preparation is what makes drilling into tile predictable instead of stressful.
Step-by-Step Guide to Drilling Into Tile
This is where everything comes together. Follow these steps carefully and you will drill clean, precise holes without cracking the tile.
Before You Begin: Check for Pipes and Wires
Before you touch the drill, scan the wall with a pipe and cable detector. Bathrooms and kitchens often have hidden water pipes and electrical wiring behind tiles.
If the detector signals something behind your drilling point, stop. Move the fixture slightly or consult a professional. Drilling blindly can cause flooding or serious electrical hazards.
Step 1: Measure and Mark the Exact Spot
Accurate marking prevents costly mistakes.
- Measure carefully and mark the hole location with a pencil.
- Use a spirit level for multiple holes.
- Hold the fixture against the wall and mark through the mounting holes for perfect alignment.
Measure twice. Drill once. Small errors at this stage are hard to fix later.
Step 2: Apply Masking Tape Over the Mark
This simple trick prevents most beginner problems.
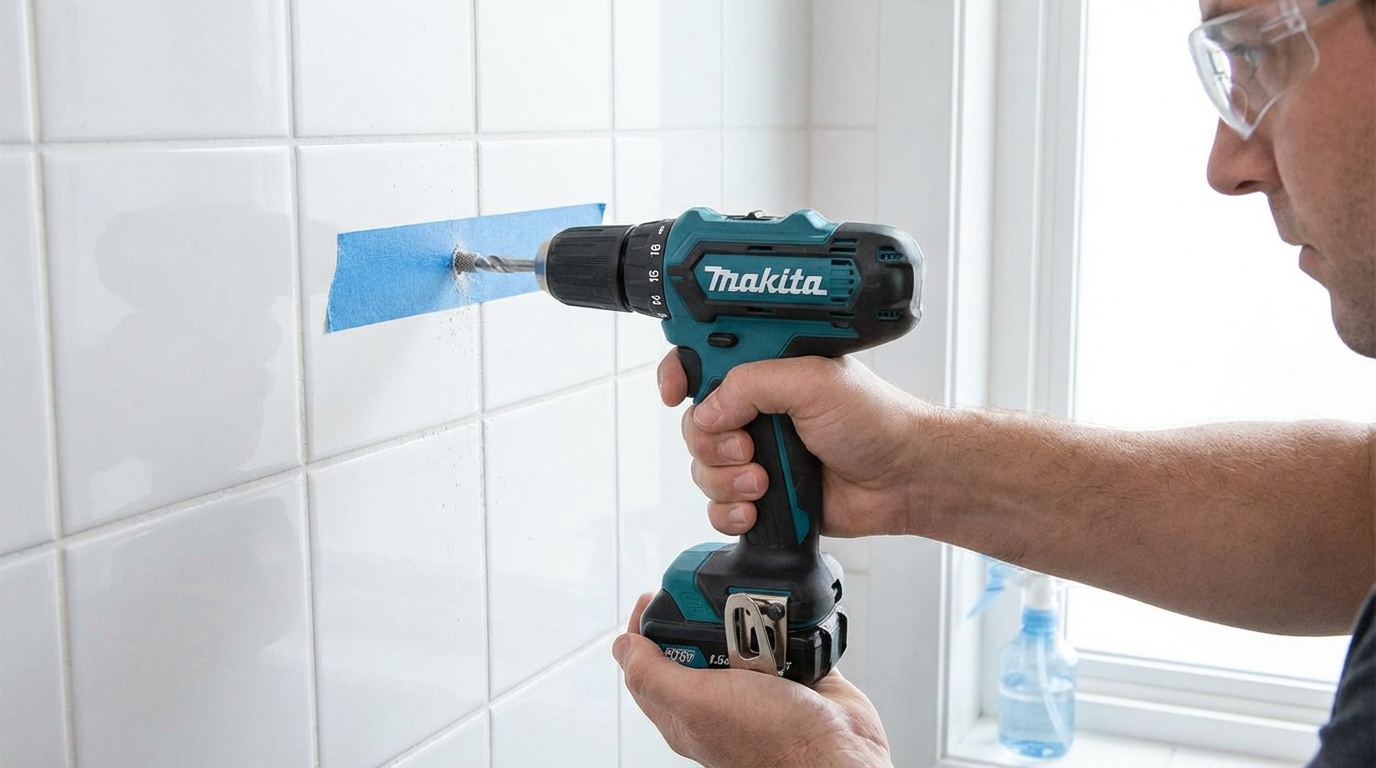
Place two or three layers of masking tape over the marked spot. Then remark the drilling point on the tape surface.
The tape creates friction so the drill bit does not slip across the glossy glaze. It also reduces chipping around the edges of the hole.
Step 3: Prepare the Drill and Bit
Insert the correct tile drill bit and tighten the chuck securely.
- Set the drill to forward mode.
- Disable hammer mode completely.
- Set speed to the lowest setting.
Keep your water spray bottle nearby. You will need it soon.
Step 4: Start at a Slight Angle
Place the drill bit tip against the marked point on the tape.
Instead of starting perfectly straight, tilt the drill about 15 to 20 degrees. Begin drilling slowly to create a small starter groove.
This groove prevents the bit from skating across the tile surface. After a few seconds, once the groove is formed, gently straighten the drill to a 90 degree angle.
Step 5: Drill Slowly With Light Pressure
Set your drill to low speed, around 300 to 600 RPM. Gently squeeze the trigger. Do not press hard.
Let the bit grind through the tile. Apply steady, light pressure. If you feel vibration or hear loud grinding, slow down.
Drill in short bursts of five to ten seconds. Pause briefly between bursts.
Step 6: Cool the Bit Regularly
Heat is the enemy when drilling into tile.
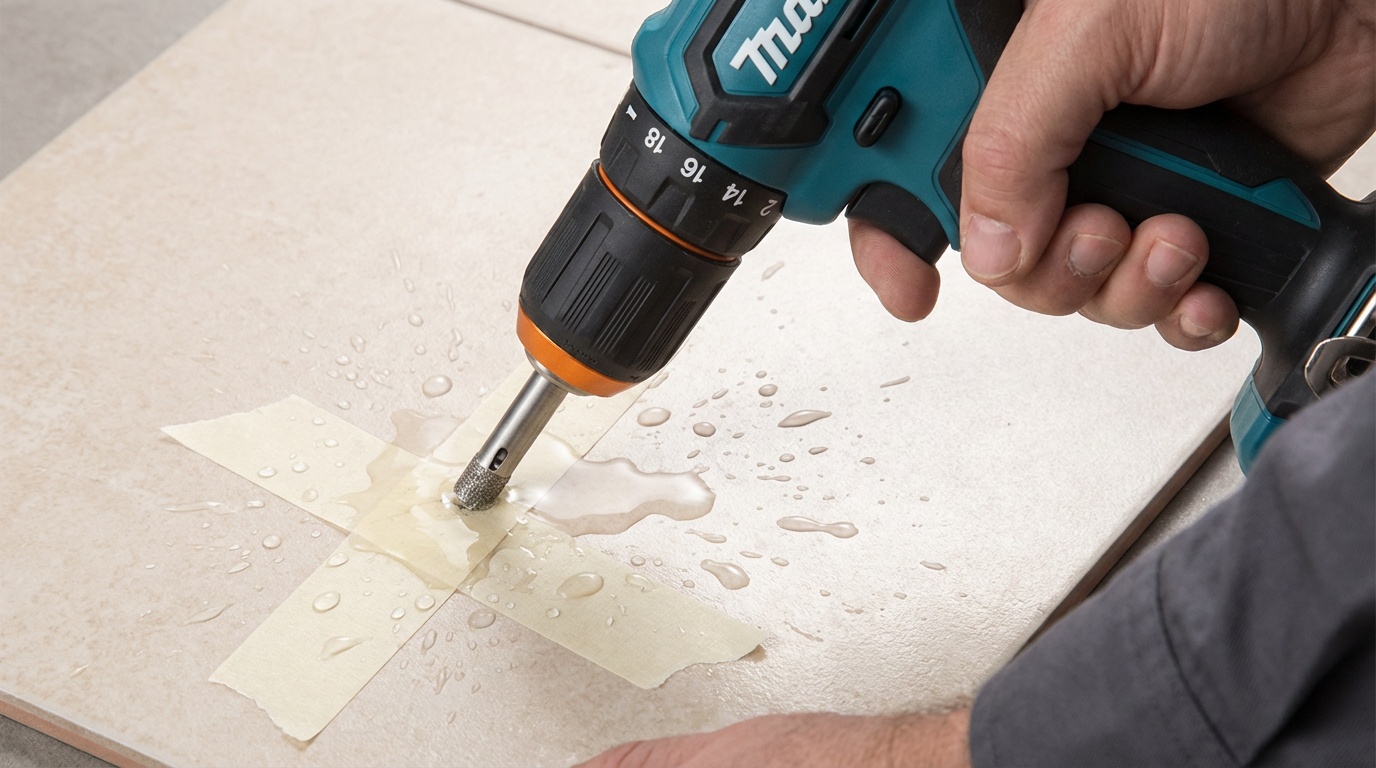
Every 10 to 15 seconds, stop and spray a small amount of water onto the bit and drilling area. You can also withdraw the bit and dip it in water.
Cooling prevents overheating, protects the cutting edge, and reduces the risk of cracks caused by thermal stress.
Step 7: Break Through the Tile Gently
As you approach the back of the tile, you will feel less resistance.
Slow down even more. Reduce pressure and drill carefully until the bit passes fully through the tile. This prevents chipping on the back edge.
Once you are through the tile, stop briefly and reassess.
Step 8: Adjust for the Wall Behind
Now you are drilling into the material behind the tile. The technique changes depending on what is there.
If there is masonry behind the tile:
- You can switch to hammer mode now.
- Increase speed slightly.
- Apply moderate pressure.
If there is drywall or plasterboard:
- Keep hammer mode off.
- Use low to medium speed.
- Apply light pressure.
Drill to the required depth for your wall plug. Mark the correct depth on your drill bit with a small piece of tape as a guide.
Step 9: Clean the Hole
Remove the masking tape and clear out dust using a vacuum or by gently blowing into the hole.
Wipe the tile surface clean and inspect the hole. It should look round and clean with no cracks around the edges.
Step 10: Insert the Wall Plug and Mount the Fixture
Choose a wall plug suitable for the wall material behind the tile.
The plug should pass through the tile hole easily and sit firmly inside the wall. If it feels too tight, slightly enlarge the hole.
Position your fixture, insert the screws, and tighten gradually. Do not overtighten. Tighten only until secure.
If everything was done correctly, you now have a clean, professional-looking hole without a single crack. That is exactly how do you drill into tile step by step and get perfect results.
Pro Tips and Techniques to Prevent Cracking
If you want perfect results every time, focus on technique. These expert tips will help you prevent tile cracking when drilling and make the process smooth and predictable.
Master Speed Control
Speed is everything when drilling into tile. Go too fast and you build heat. Heat leads to cracks.
The ideal speed for most tile drilling jobs is between 300 and 600 RPM.
- Ceramic tiles: 400 to 600 RPM
- Porcelain tiles: 300 to 400 RPM
- Natural stone: 200 to 400 RPM
Tile drill bits do not cut like wood bits. They grind through the surface. That means slower speed gives cleaner results.
If progress feels slow, resist the urge to increase speed too much. Stay controlled and patient.
Use Light, Steady Pressure
One of the biggest mistakes in tile drilling technique is pushing too hard.
More pressure does not mean faster drilling. It creates friction, overheats the bit, and increases stress on the tile.
Instead, apply firm but gentle pressure. Think of it as guiding the drill, not forcing it. Let the bit do the work.
For better control:
- Keep your dominant hand on the trigger and handle.
- Use your other hand to stabilize the drill body.
- Stand square to the wall with stable footing.
This improves accuracy and reduces wobbling.
Always Cool the Drill Bit
Water cooling is a professional habit. It dramatically reduces the risk of cracks.
When drilling ceramic tiles or drilling porcelain tiles, friction builds heat quickly. Heat dulls the bit and stresses the tile glaze.
To prevent this:
- Spray a small amount of water every 10 to 15 seconds.
- Drill in short bursts instead of continuously.
- Dip the bit in water if drilling deeper holes.
You do not need to flood the surface. A light mist is enough to keep temperatures down and extend bit life.
Choose the Right Bit for the Tile Type
Not all tiles behave the same.
Ceramic tiles are softer and easier to drill. Carbide-tipped bits usually work well. They are more forgiving and suitable for most bathroom walls.
Porcelain tiles are denser and harder. Diamond-tipped drill bits for tiles are essential. Carbide bits often overheat and wear out quickly on porcelain.
Natural stone like marble or granite requires extra care. Use diamond bits, slow speed, and generous cooling. These materials can be brittle and less forgiving.
Matching the correct drill bit to the material is one of the most effective ways to prevent tile cracking when drilling.
Use the Tape Trick Every Time
Masking tape is simple but powerful.
It prevents the bit from slipping on glossy surfaces and reduces chipping around the hole.
For best results:
- Apply two to three overlapping strips over the drilling point.
- Mark the hole center on the tape.
- Leave the tape in place until drilling is complete.
This small step can save you from scratched tiles and misaligned holes.
Drill Pilot Holes for Larger Diameters
If you need a hole larger than 10mm, do not start with the final size bit.
First drill a small pilot hole using a 3mm or 4mm diamond bit. This establishes a precise center and reduces stress on the tile.
Then switch to the final size bit and enlarge the hole slowly.
For holes above 20mm, use a diamond core bit. Large openings require even slower speeds and steady cooling.
Avoid Tile Edges and Grout Lines
Whenever possible, drill through the center of the tile.
Edges and grout lines are weaker areas and more prone to cracking or chipping. Try to stay at least 20mm away from tile edges.
If you must drill through grout, use a sharp masonry bit and expect slightly less precision. In some cases, you may need to touch up the grout after installation.
By combining slow speed, light pressure, proper cooling, and the right drill bits for tiles, you dramatically reduce the risk of damage. These are the small details that separate clean, professional results from cracked surfaces.
Common Mistakes and How to Avoid Them
Most cracked tiles are not bad luck. They are the result of small, avoidable mistakes.
Learn these now and you will save time, money, and frustration.
Using Hammer Mode on the Tile Surface
This is one of the fastest ways to destroy a tile.
Hammer mode creates rapid impact vibrations. Tiles cannot absorb that shock, especially glazed ceramic and porcelain.
- Keep hammer mode OFF while drilling through the tile.
- Only switch it on after you fully pass through the tile and reach masonry behind it.
If you are unsure, leave hammer mode off. It is safer for tile surfaces.
Choosing the Wrong Drill Bit
Using a wood or metal bit on tile simply does not work. The bit will skate across the glaze, overheat, and dull quickly.
Another common issue is using worn or cheap bits. Dull bits create more friction and increase the chance of cracks.
- For ceramic tiles, use carbide-tipped or tile-specific bits.
- For porcelain tiles, use diamond-tipped drill bits for tiles.
Quality bits last longer and produce cleaner holes.
Drilling Too Fast
High speed creates heat. Heat creates stress. Stress leads to cracks.
Many beginners pull the trigger fully from the start. That is a mistake.
Keep your speed between 300 and 600 RPM. Stay controlled from start to finish. If you are wondering what speed to drill tiles, low speed is almost always the correct answer.
Applying Too Much Pressure
Pushing harder does not make drilling into tile faster. It actually increases the risk of damage.
Too much pressure can:
- Overheat and dull the bit
- Cause the tile to crack from concentrated stress
- Make the drill jump or slip
Use steady, light pressure. Let the bit grind gradually through the surface.
Skipping Water Cooling
Heat buildup is one of the main reasons tiles crack when drilling.
If you drill continuously without cooling, the bit can overheat and the tile glaze can weaken.
Spray water every 10 to 15 seconds. Drill in short bursts. This simple habit dramatically reduces risk.
Starting at the Wrong Angle
If you start perfectly straight on a glossy tile, the bit can slide across the surface and scratch it.
Instead:
- Start at a slight 15 to 20 degree angle.
- Create a small groove.
- Then straighten to a 90 degree position.
This technique keeps the hole centered and clean.
Not Checking for Pipes or Wires
Drilling bathroom tiles without scanning the wall first can lead to serious problems.
Behind tiles you may find:
- Water pipes
- Electrical cables
Always use a pipe and cable detector before drilling. If something is detected, adjust your drilling position.
Incorrect Measurements
Drilling in the wrong spot means living with visible mistakes or trying to patch holes.
To avoid this:
- Measure carefully.
- Use a spirit level for alignment.
- Mark through the fixture itself for accuracy.
Small preparation steps prevent permanent errors.
Forcing the Wrong Wall Plug
If the wall plug is too large for the hole, forcing it in can crack the tile from internal pressure.
The plug should slide through the tile hole and grip inside the wall behind it. If it is too tight, slightly enlarge the hole instead of forcing it.
Overtightening Screws
You drilled perfectly. The plug fits. Then the tile cracks while tightening the screw.
This usually happens because of excessive torque.
Tighten screws gradually until the fixture is secure. Stop when you feel resistance. If possible, use washers to distribute pressure.
Punching Through Too Aggressively
As the drill bit exits the back of the tile, resistance suddenly decreases.
If you are drilling too fast or pushing too hard at this moment, the tile can chip around the hole.
Slow down during the final few millimeters. Reduce pressure and let the bit pass through gently.
Ignoring Safety Gear
Tile fragments and dust can fly toward your face while drilling.
- Always wear safety glasses or goggles.
- Use a dust mask to avoid inhaling fine silica dust.
If you are working in a bathroom and using a corded drill, keep water away from electrical connections. A cordless drill is often safer in damp areas.
Avoiding these common errors makes a huge difference. When you combine the right tools, correct tile drilling technique, and patience, drilling ceramic tiles or drilling porcelain tiles becomes predictable and safe.
Now you know exactly how do you drill into tile without cracking it. The formula is simple: use a quality drill with variable speed, choose the right drill bits for tiles, keep your speed low, and apply light, steady pressure.
Add masking tape, cool the bit with water, and always check for pipes or wires before you start.
Most tile damage happens because of rushing. Slow speed and patience prevent almost every problem. Your first hole might feel stressful. By the fifth, it will feel routine.
If your drill lacks proper speed control or you need diamond bits for porcelain, upgrade your setup before you begin. The right tools turn a risky job into a straightforward project you can complete with confidence.